Hello Lovelies! I have a new tutorial for you: how to make your own erasers! And just in time for everyone going back to school! It's actually got to be one of the most fun DIY projects I've done so far.
What you're going to need:
Eraser putty, I got mine from Amazon
An Xacto knife or something to cut the putty
A pencil
And maybe some glue
The first shape we're going to make is the Pokéball. So take your red and white putty and a little bit of the black. The putty is going to be a bit solid to start off with so just kneed it until it becomes more pliable.
Now turn them both into the same sized balls and then flatten one side so that you've got two domes.
Then push them together. Be gentle though, so that you don't ruin the shape. If it doesn't look perfect, don't worry.
Take the black and roll it out like so:
And flatten it. I just used my Xacto knife because that's what I had and it actually worked pretty well. Just keep the cap on the blade so you don't hurt yourself.
Once it's flattened out wrap it around the centre of the ball so that it covers where the red and white join together. Use the knife to cut off any of the excess black putty.
Next take a tiny blob of black and a slightly smaller one of the white and flatten them. Then press the black on first, then the white on top of that. If I'm not explaining this right, feel free to use the picture bellow as a reference:
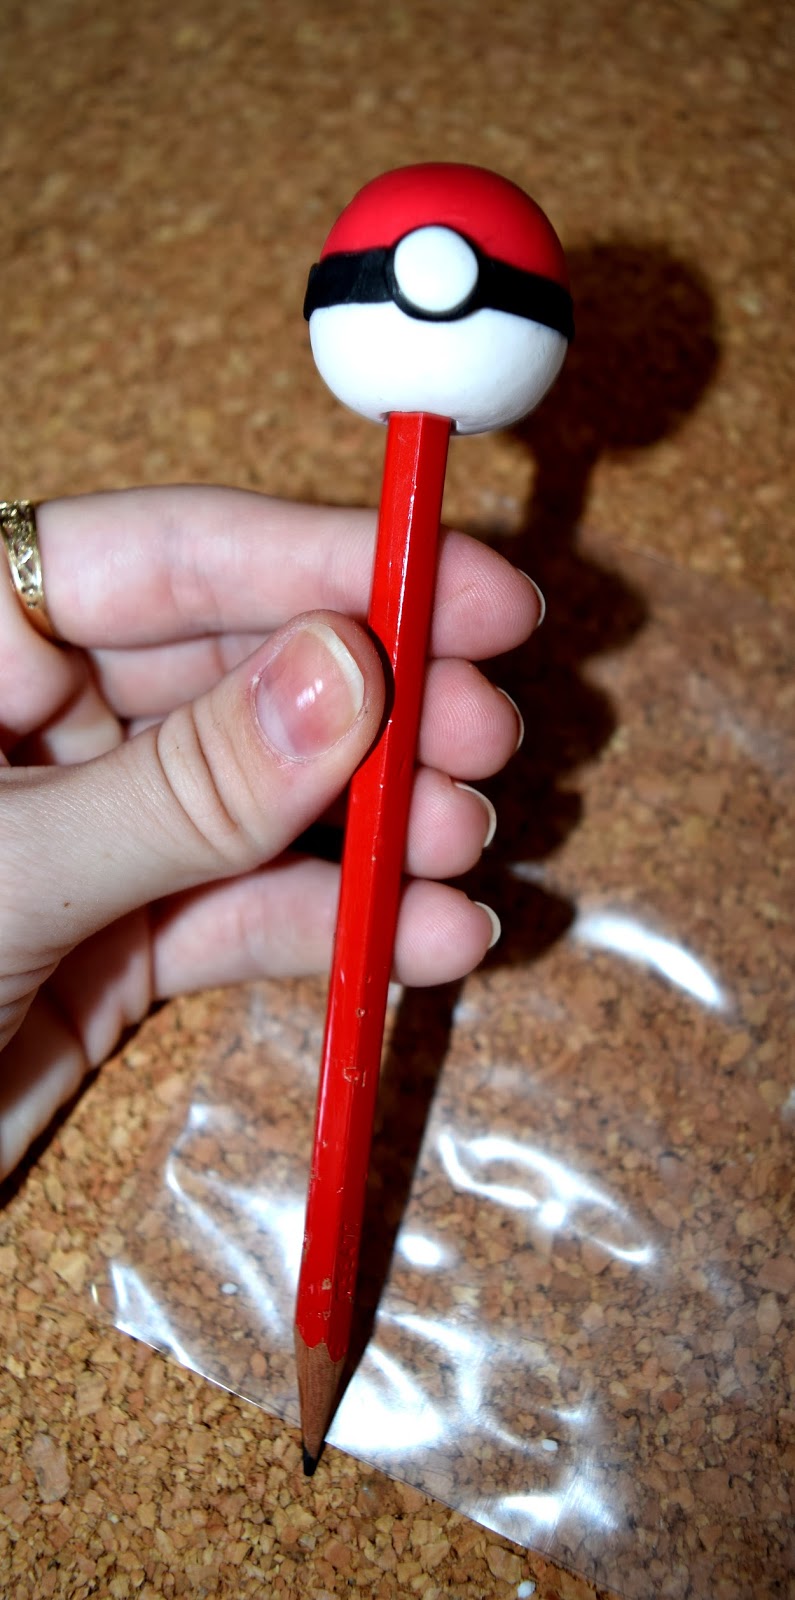
You could be finished now, but I decided to make it into an eraser for the end of my pencil. All you have to do for this is to take the pencil and gently push it into the bottom of the eraser.
And ta-da! There you have it. Now all you have to do is follow the instructions that come with your eraser kit. Mine needed me to boil them for a few minutes, but yours might need something different. Just remember that no matter how you've got to set the putty, allow it to cool before using it or handling it.
The next Eraser I made was the Poop Emoji. I know, really mature, but it's one of my favourite so whatever. Take the brown putty and two small blobs of the black and white putty.
Roll out the brown putty into a long string. As you can see, I got a photo of the emoji up on my phone so I had something to use as a reference.
And now start coiling it around and up.
You should end up with something like this:
Now it's time to make the eyes and mouth. Take the white putty and break it into three pieces. Make two of them equal sized ovals and the third into a circle.
To make the smiley face I used my knife and cut the circle in half to get a nice, neat semi circle.
To make the pupils just take the black putty and make two small black ovals and place them in the centre of the white ovals.
And then gently press them onto the brown putty, and there you go. Now boil or bake, depending on the instructions and there you have it! Your very own Poop Emoji.
The third eraser I made was a lollipop. Take three colours of your choice, I went with purple, blue and pink, and then take some white and a little bit of yellow and orange.
Mix together the white, yellow, and orange putty together.
And roll it into a short, fat snake shape and set it aside. This will be used as the stick for the lollipop.
Roll out the other three colours into long, thin snakes and stick them together at one end.
Then twist them around one another until it looks like this:
And roll them all together into one single strand
The next step is to twist the strand into a twirl.
Now take the stick and press it to the back of the twirl.
Make a second lollipop face
And press it down on the other side of the stick to completely cover it up. Cook it and let it cool and there you have it, a lollipop eraser!
Here are a couple of other erasers I made:
A crying laughing emoji
And an Ice cream cone!
That's it! It's so simple and fun and customizable. You can make any shapes you want, like cake, or pizza, or different emoji faces or love hearts. You can keep them for yourself and have your own individual erasers or give them away to friends as cute, personalised gifts.
I hope you liked this tutorial, let me know what you think!




 Posts
Posts


