DIY Cupcake Candle

Hello Lovelies! So here's a new and fun tutorial for you: a very simple, do it yourself scented candle in the shape of a cupcake! Don't they look so cute? Here's what you're going to need:
A couple of microwavable containers
Wax, I used Paraffin Container Wax
A candle scent of your choice, I went with Black Cherry
Candle dye
Silicone cupcake moulds
Candle wicks
A whisk
A ziplock bag
Some scissors
Sprikles (optional)
And some wooden sticks

The first step is to cut the wax you're using into small chunks and place into one of your microwave safe containers and place it in the microwave. Turn the microwave on and set the timer about five to six minutes. Be sure to check on the wax regularly and to stir occasionally to ensure the wax is melting evenly. If your wax isn't finished melting then keep going, but check up on it ever 10-20 seconds until it's fully melted.

Whilst your wax is melting go ahead and grab your moulds. Place the wicks in the centre of them and then use the wooden sticks to hold the wicks in place. This will stop them falling over when you pour the wax into the moulds later.

When your wax is completely melted remove the container from the microwave. Do so carefully, with a glove or something to protect your hand as the container may be hot. Then go ahead and pour in a little of your chosen scent. If you're not sure how much to put in a good rule of thumb to follow is an ounce of scented oil for every pound of wax. Stir in the scent for a good couple of minutes to make sure it's evenly distributed.

Then pour about half the wax into your other microwavable container and set aside for later.

Take the remainder of your melted wax and and add the candle dye to it. Stir it in until it is completely dissolved. Now, I know that in a previous post I said that you can use crayons to colour your wax, but I'd like to add a note: crayons can clog the wick, which will mean the flame dies and the candle stops burning. If you want to make candles of a higher quality then I recommend investing in some proper candle dyes.

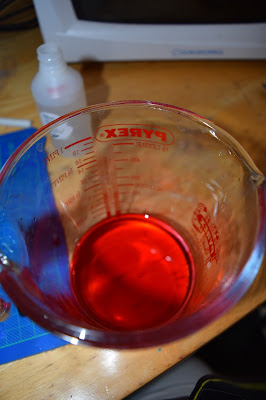
Once the colour is fully dissolved the next step is to pour the wax into the moulds. Do so carefully and try not to spill anything. If you get the hot wax on yourself it will hurt.

Be sure to leave a gap between the surface of the wax and the top of the silicone moulds as displayed in the picture below. Set these aside and let them cool. You can put them in the fridge if you want, but I find that this promotes dipping in the wax as it hardens so I prefer to just leave them out. Let them cool for a little while before moving on to the next step.

Remember the wax you set aside earlier? It's time to go grab it. By now it's probably cooled down and hardened so go ahead and pop it back in the microwave for a few seconds. Don't leave it in there for too long though, you only want it to heat up a little. Then grab your whisk and, you guessed it, start whisking the wax. You need to be a bit patient here, and be prepared to put in some elbow grease as you've got to get the wax to the point where you can make peaks in it. This will take a good few minutes.

Once the wax is at the right consistency take your ziplock bag, cut a small hole in one of the corners and start filling the bag with the wax. I found it easiest to use a spoon to get all the wax into the bag.

The next step is where it gets fun. First, remove the wooden sticks from the wicks and then start piping the wax out onto the cupcake candle bases. Use the mould as a guide to see where the icing should go.

You can put as much of the whisked wax on as you want, it's entirely up to you! Mine ended up looking like this:
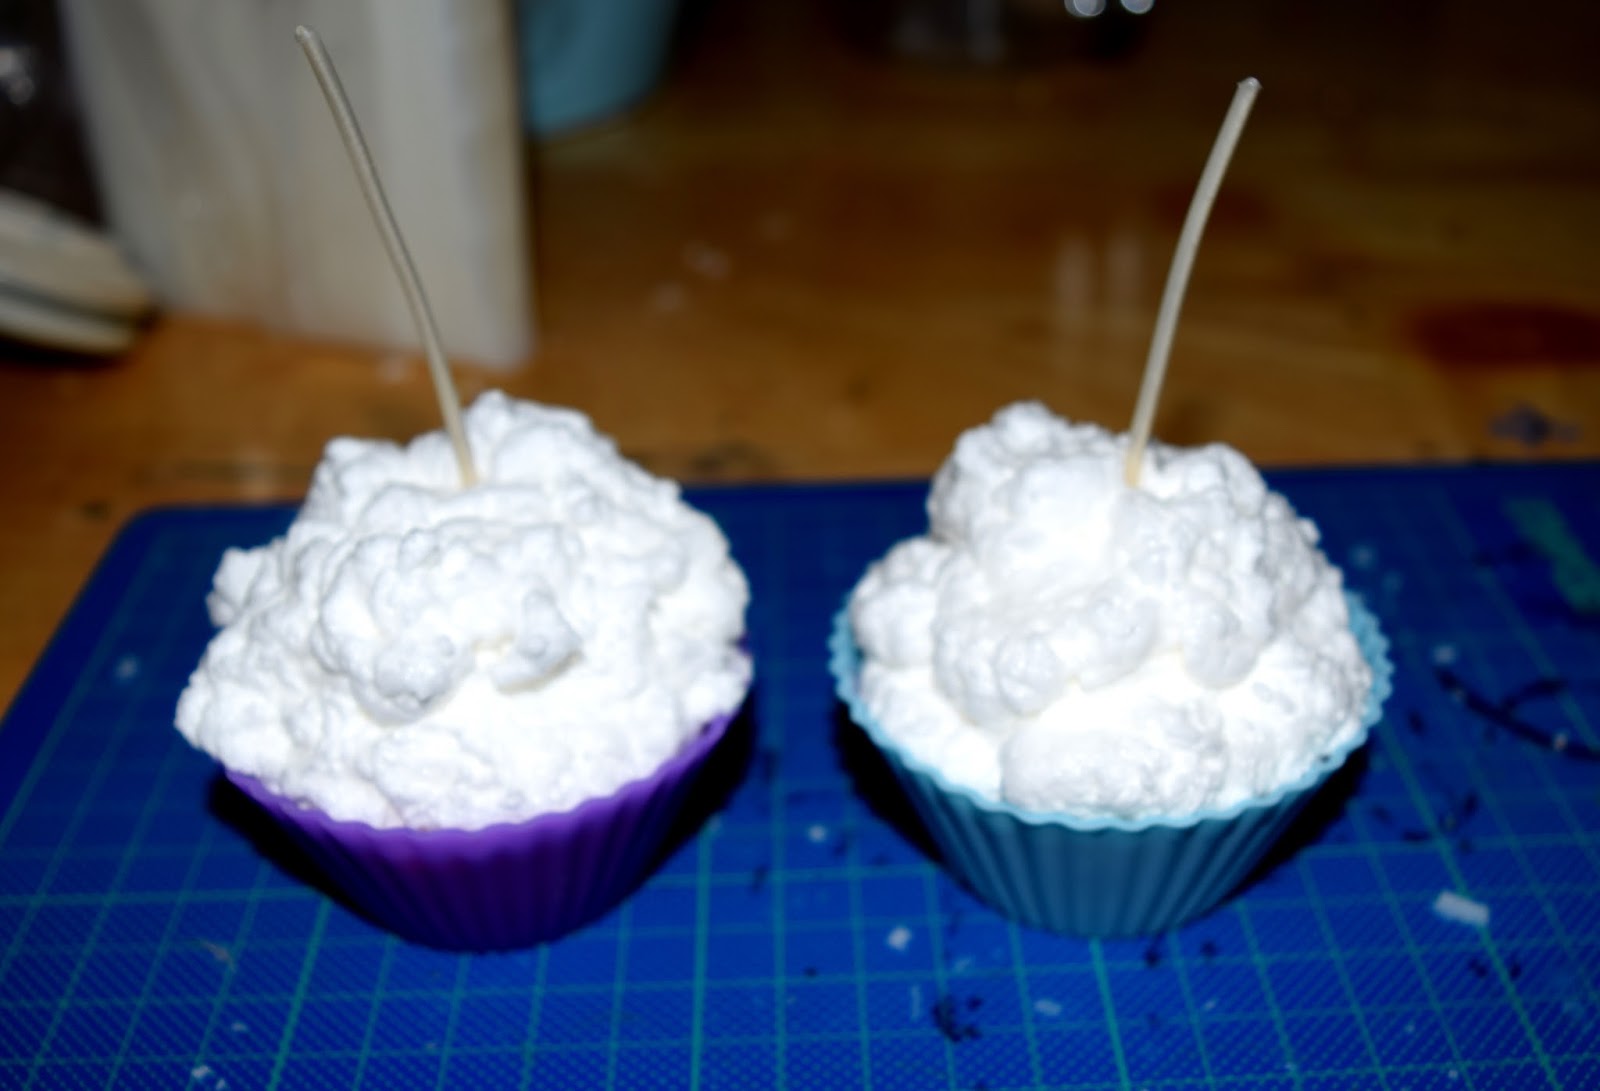
My next step was to take the candles and, whilst the wax was still soft, gently pour some sprinkles onto them, just for an extra touch of authenticity. You don't have to do this if you don't want to, I just thought it made them look that much cuter.

Once you're finished all you have to do is wait for them to cool down completely and then carefully remove the silicone moulds and trim the wicks. And viola! You've got yourself a pair of cupcake candles! Aren't they cute?
I do recommend that when you light these you keep them on a protective surface. I used an old lid off a tube of Pringles and that worked a treat to protect my table from any stray melted wax.

I hope you've enjoyed this DIY! Let me know what you think!


Post a Comment