Social icons

Followers

Showing posts with label tutorial. Show all posts

Festival Inspired Eyeliner / Rainbow Eyeliner


Hello loves! Summer is here, and along with it come a whole host of fun festivals and parties to go to so I figured I'd try and come up with a look that's just as fun and colourful to go with all the excitement. What I ended up doing was an ombre, colourful eyeliner look and I've actually worn it to a couple events and nights out and have received loads of compliments on it! So If you'd like to learn how to recreate this look, just carry on reading, it's honestly so simple!

What you'll need:

Colourful eyeliner of your choice.
Matching Eyeshadows
An Eyeliner Brush
And some mascara, to finish the look


So first things first, take your eyeliner brush and load it up with the lightest eyeliner shade. The colours I chose were light blue, blue and purple, but obviously if you want you can use different colours depending on your outfit or your mood, and you can use more or fewer colours if you'd like.


Apply the lightest shade to the inner third of your eye like so:


Then apply the blue to the middle of the eyelids, making sure to blend the two colours where they meet. I also started to thicken out the liner towards the outer corner of my eye to start preparing for the wing.


And then take the final colour and finish of the wing of your eyeliner with it. Again, make sure to blend in the colours so there's no harsh lines and it's a smooth transition from one colour to the next. Don't worry too much if it's not neatly done, we can fix that with the next step.


The next thing I did to really get the colours to stand out was to go over each of them in a matching eyeshadow shade. This just adds to the depth of the colour and the powder is a lot easier to control and blend to help achieve that gradient effect.


And the final step is to simply apply your favourite mascara or false lashes and you're good to go!


And this is the finished look, I hope you've enjoyed this post and like the look! Let me know what you think :)


Tips for Voluptuous Looking Lips


I've noticed a trend going around lately, and I'm pretty sure everyone has seen it: big lips. So I figured I’d hop on the band wagon and share a few tricks I've learnt to make your lips look a little larger. There’s nothing extreme here, no shot glasses, no injections and definitely no tattoos (yes, you can get your lips tattooed to look bigger), just good, old fashioned make-up tips.


Before I divulge all my secrets though, I would like to have a little ponder. The lengths I've seen people go to get bigger lips, in all honesty, kind of scares me. Now, I would never judge anyone, you do you all the way, but for me, personally, getting injections or tattoos or even sucking on a shot glass seem a bit extreme, one: I have a strong dislike for needles, and two: what if something went wrong? What if the injections looked weird? What if I didn't like it? At least with make-up I can just wipe off my mistake and try again. I do understand the desire though. I used to be so insecure about my lips and really hate them. I was convinced they were too skinny, that I couldn’t wear lipstick because they just looked weird. I’d look at photos of myself wearing lipstick and just cringe. It was a sad time for FranFran. Now though, since learning these tips, I’ve completely changed my mind. I actually love my lips, and I’ve developed what some might call a slight addiction to lipstick. So hopefully the tips I’ll be sharing with you today will help you out in the same way, and help you feel more comfortable in your own skin!

Tip #1


Okie dokie, now the rambling’s over, onto the first tip: Exfoliate and moisturise you lips. You can do this using a simple sugar scrub, I’ve got a tutorial on how to make one here. You only have to do this two or three times a week, just to make sure there’s no dead or flaky skin hanging about. And then use whichever lipbalm you like.  

Tip #2


Second tip: use a primer. There are quite a few out there but my personal favourite is Lip Plump by Benefit. It primes and plumps all in one and that's pretty dandy if you ask me.

Tip #3


The third tip I’ve mentioned before as well, in my How To: Master the art of lipstick post but I’ll say it again: over draw your lips a little. It’s not a crime and it’s the fastest way to get larger looking lips. Honestly. I used to be scared of doing it, now it’s an everyday thing. It’s so easy once you get the hang of it! Just exaggerate your cupid’s bow slightly and the centre of your bottom lip and you’re good to go! If you want to do more, feel free, but just be careful of not making it look to clownish. Check out this post for tips on it.

Tip #4


Now pick your lipstick and apply away. Once you’ve got it on, here’s another trick: Use a slightly darker lip liner to colour in the corners of your mouth. This will create an ombre effect and give your lips a little more dimension, making them look bigger.

Tip #5


Tip number four: Take a light or shimmery eyeshadow and dab it on the centre of your lips. This'll also create the illusion of bigger lips by adding a bit of dimension.

Tip #6


And my final tip: a bit of contour. Yes, you read that right. Grab your contour, or a cool matte brown eyeshadow and apply some just underneath your bottom lip, this will accentuate your pout, making it look like your bottom lip sticks out a little more than it actually does.


And that's it! Those are my tips for voluptuous lips, hope you've found this helpful! Let me know what you think! 

False Nails Tutorial (no acrylic!)


This post has been moved to: http://francescavictoria.co.uk


You'll be able to find this post and lots more on this new website!

New Year's Eve: Glitter Eyeliner


This post has been moved to: http://francescavictoria.co.uk


You'll be able to find this post and lots more on this new website!

DIY: Makeup Setting Spray


Hello Lovelies! Here's a quick post on how to make your own makeup setting spray! It's actually ridiculously easy only needs two ingredients: Glycerine and filtered water. It works because the glycerine helps bind your makeup to your skin which'll help it last longer.

What you're going to need:

Filtered water (either from a bottle or water filter)
A spray bottle
Glycerine (you should be able to find this in any pharmacy)
And for a decorative touch: Some labels


So take your spray bottle and add the glycerine. The rule of thumb here is to make fill it up a tenth of the way with glycerine, but you can adjust it depending on what you think you'll need.


Then fill it up the rest of the way with water, screw on the cap and shake until everything is nicely mixed together!


And that's literally it, you've got your very own makeup setting spray. It'll last you about two weeks, but you can always make more with whatever glycerine you have left over.
Now, to use it hold the bottle at about an arm's length away from your face and spray it lightly. Try not to hold it too close to your face or using too much because otherwise you'll just end up wetting your makeup rather than setting it.

I hope this was useful, let me know what you think!


DIY: Room Decor part One


Hello Lovelies! This is the first part of a mini series inspired by a friend of mine. She asked me for ways to spruce up her room and to really turn it into somewhere she feels at home and motivated so this is one of the projects I came up with! They're a really great way to organise your room whilst adding a personal touch to your room!

What you're going to need:

Mason Jars (a variety of sizes)
Chalk Paint
Gold Paint
Glue gun
Labels
Stick back plastic,
Washi tape / Fabric Tape
Lace
Scissors
PVA Glue
Food Dye
Chalk


 So for the first jar I took one of the small mason jars and took the lid off it and used the fabric tape to cover the gold.


Then I just used my glue gun and went all around the edge of the inside of the lid before I grabbed the mason jar and sat it in the hot glue to glue them together. I do this just to give the jar a bit more decoration.


I then took the lace and glued it around the bottom of the jar, making sure that the seems line up, just to keep everything looking as clean as possible.


Now take another strip of lace and glue it around the top of the jar, just under band. That's one jar done! Isn't it cute?


Now, for the next jar I took a label and the sticky back plastic and traced around it with a pencil.


Then I folded the piece in half and made a small snip with my scissors and proceeded to cut out the inside of the shape. 


You should end up with something like this:


I then peeled off the back of the sticky back plastic and carefully stuck the plastic to the jar. When I had it positioned how I wanted I took the chalk paint and began to fill in the cut out.


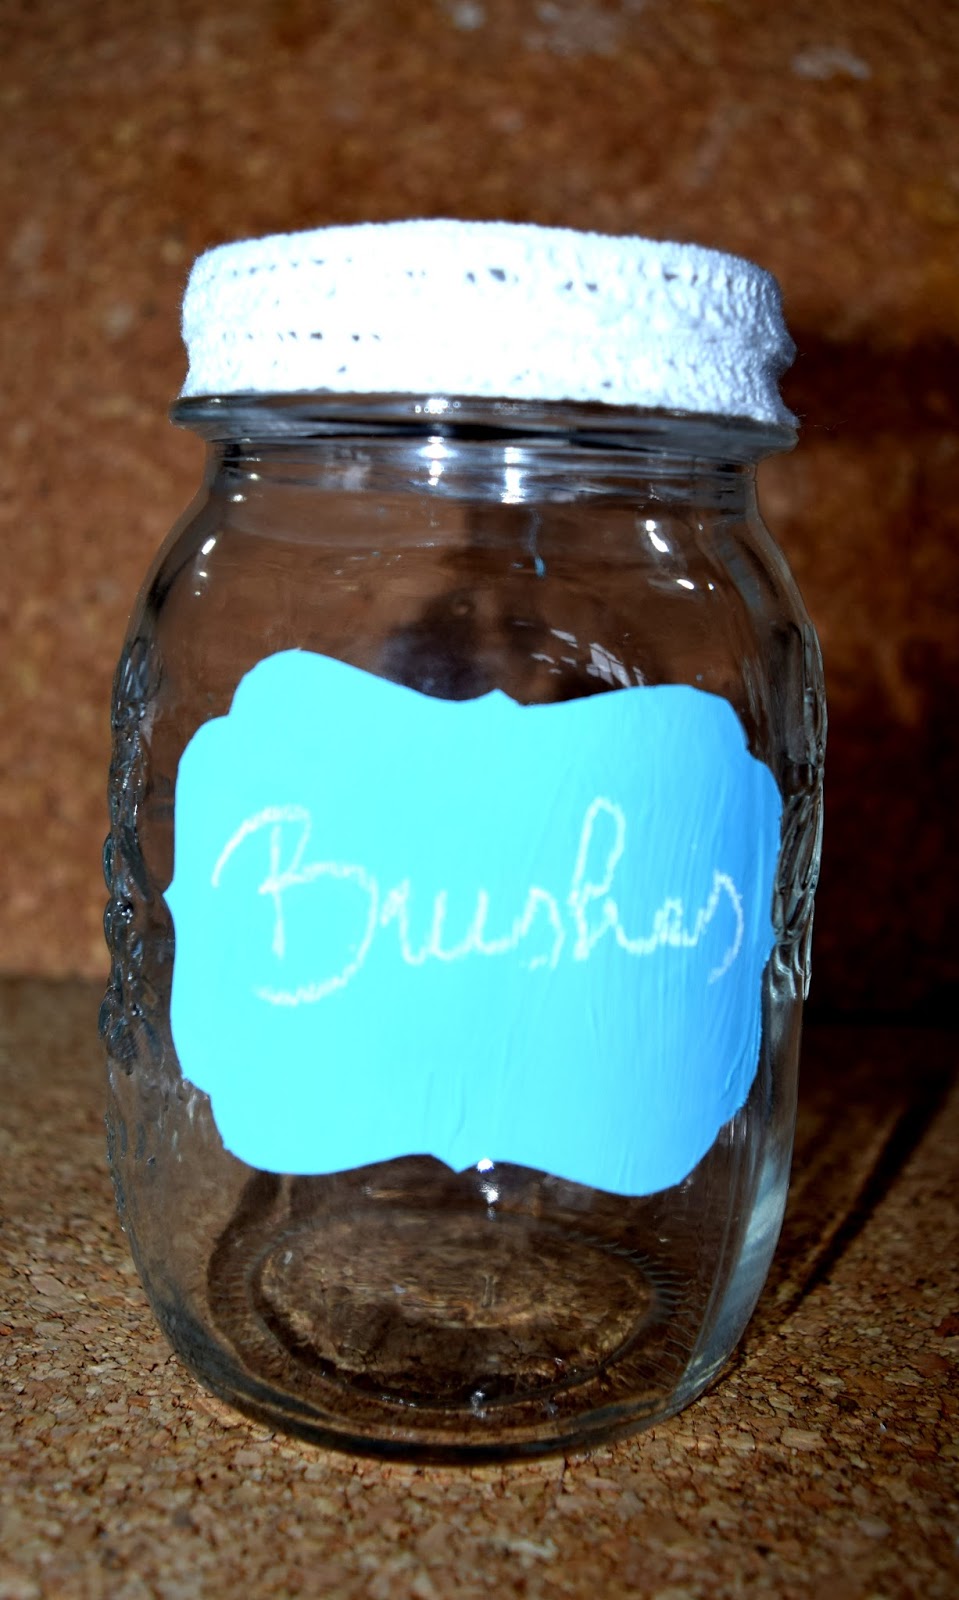
It'll take a couple of coats before the chalk paint is completely opaque. Let it all dry completely, then take some lace and glue it around the very top of the jar. When the paint is dry go ahead and grab your chalk and write whatever you want on the jar. I just wrote "brushes" because I'll be using this jar to store some of my makeup brushes. (Very imaginative of me, I know haha!)


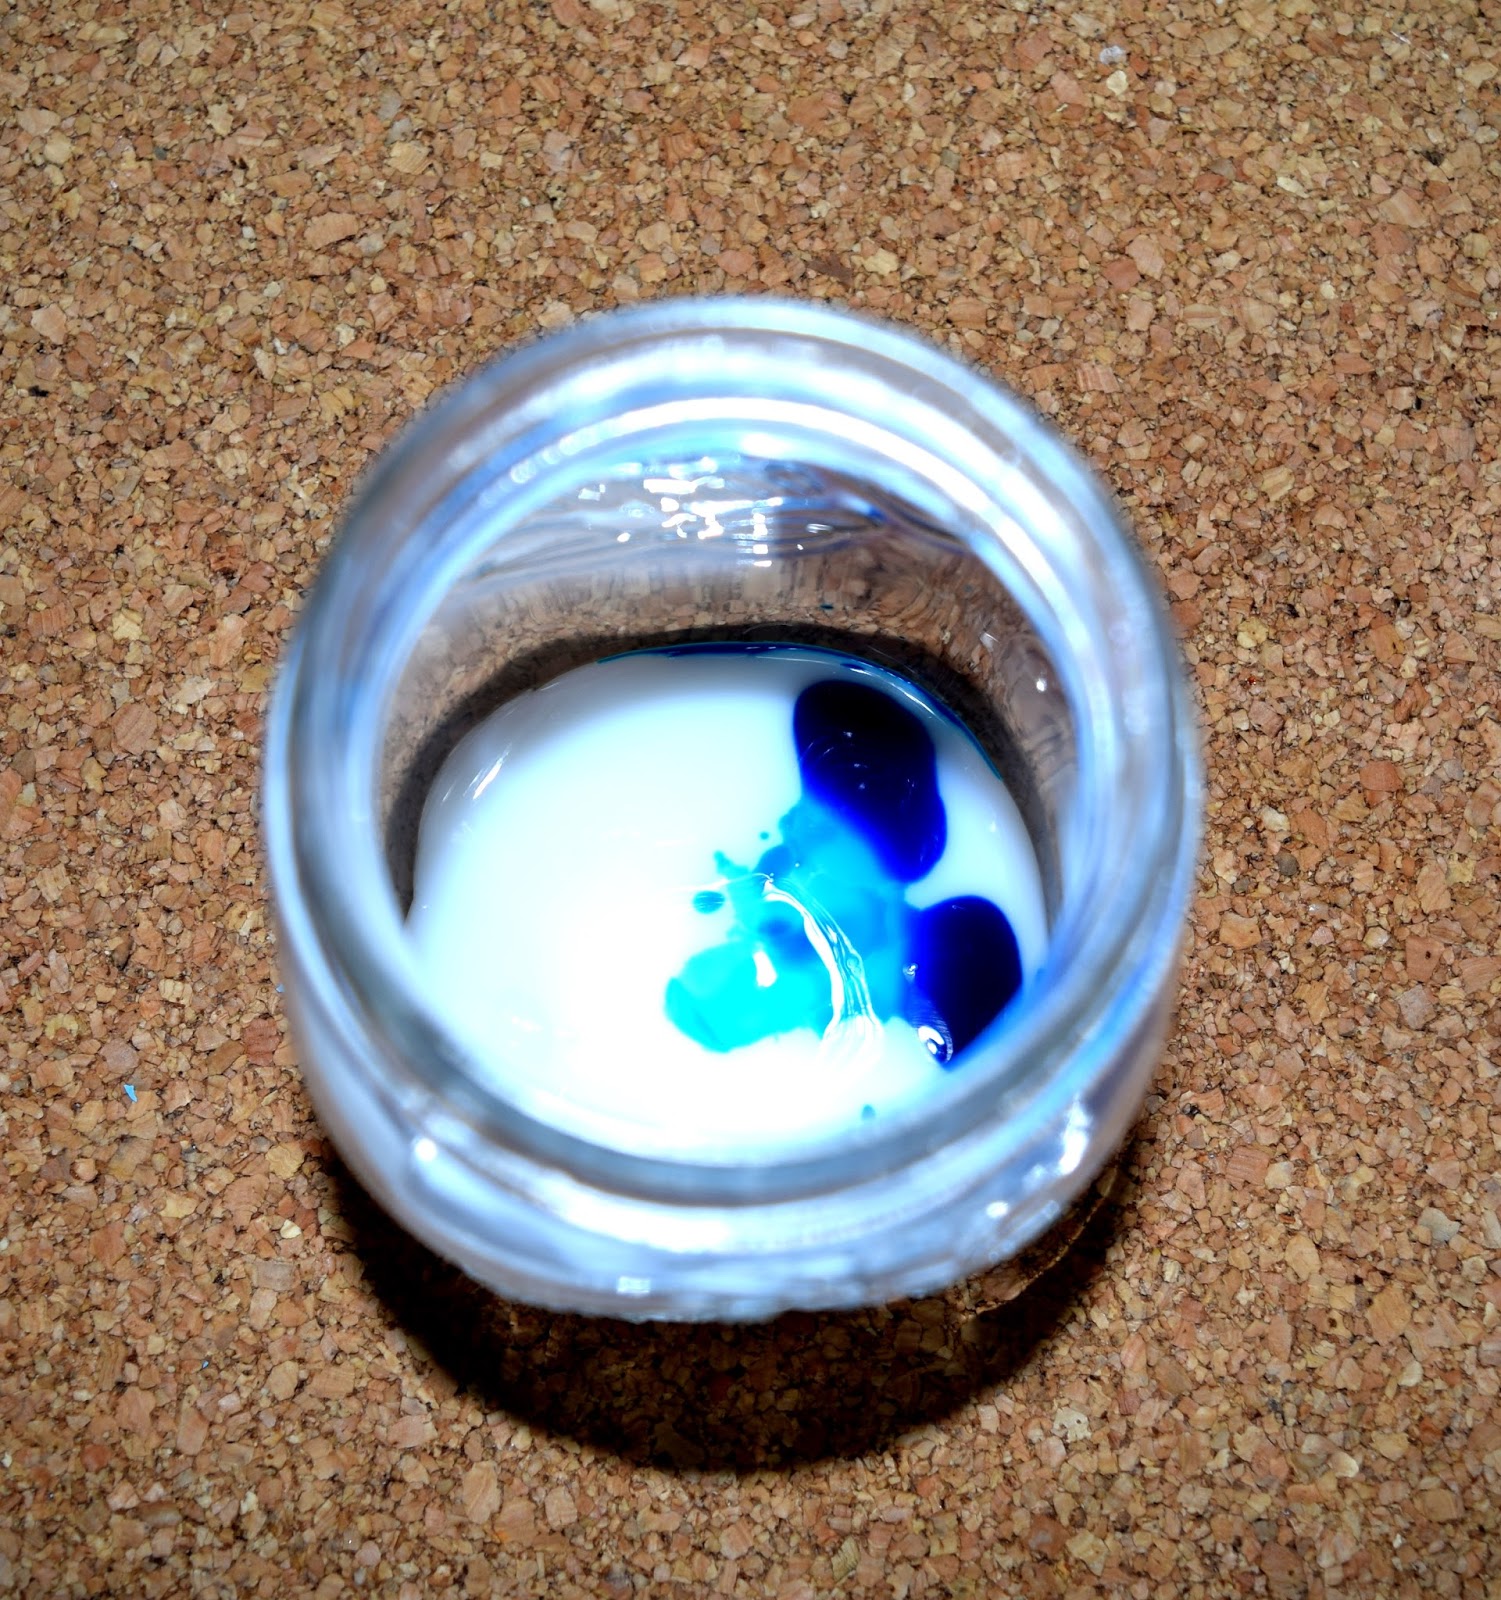
For the next jar I took some PVA glue and food colouring. Obviously I went for blue!


Okay, so fill the jar to about a fifth of the way up with PVA glue and then add a couple drops of food colouring. Adjust how much colour you put in depending on how strong you want it to be.


Mix it all together and then begin to roll the jar around until you've got the entire inside of the jar covered in the colourful glue. Now just leave it upside down on some kitchen towel and let the excess glue fall to the bottom and onto the towel. Once this is done and all the extra glue is at the bottom, throw out the kitchen towel and let your jar dry for a couple of hours.


I ended up with this really pretty blue jar:


But I felt that it was still a little bit bland so took some gold paint and painted around the top of the jar. Again, it'll take a couple of coats but it'll end up looking amazing! Plus, it matches perfectly with the Jewellery Organiser I did a tutorial on a few weeks ago (here's a link to that: DIY Jewellery Organiser)


For the second to last jar I just took some of the fabric tape I had left and wrapped it all the way around the top of the jar then added a cute ribbon I made out of the lace.


The I took the lid and painted it with a couple of coats of the chalk paint.


Once it was completely dried I used the glue gun and  once again glued all the way around the inside of the lid.


It ended up looking really cute in my opinion!


So the last jar is really easy, I just grabbed a label, painted one side with chalk paint, waited for it to dry, and then painted the other side. Then I took some of the lace and used it to tie the label to the jar.


This is the finished product: 


I hope you liked this blog post! Let me know what you think!


Make Your Own Hair Bows


Hello Lovelies! I'm back with another tutorial, this one is very simple and super cute: DIY hair bows! This is so much fun and an inexpensive way to make some cute hair accessories, you can make them whatever colour you like and mix and match patterns if you wanted!

What you're going to need:

Your choice of fabric, I'm just using some scrap fabric I had,
Scissors,
Glue Gun
And Crocodile hair clips


First step is to cut out a square and a rectangle from your desired fabric. I didn't measure exactly, I just kind of eyeballed it, but obviously make the sizes bigger or smaller depending on what size you want you bow to be.


Next, take the square piece of fabric and fold over the edges to create a rectangle. Make sure the edges of the fabric are overlapping.


Now take the hot glue gun and CAREFULLY glue the overlapping edges together.


Once you've done this the next step is to fold in the corners to create a single point and glue them down. It doesn't have to be perfect so don't worry about it if it's not exact!


Fold the two edges into the centre to create a small rectangle, but don't glue anything just yet!


The next thing to do rather than glueing is to turn over the rectangle and then pinch it in the middle, as demonstrated in the picture bellow:


Now it's time to adjust and play about to get the look you want and once you're satisfied add a dollop of glue to the back and let it cool. Remember the thin rectangle of fabric we cut earlier? It's time to use it. All you need to do is wrap it around the centre of the bow like so:


And then glue it so that it doesn't come undone.


The final step is to take your crocodile hair clip, add some glue to it and then press it to the back of your bow.


Make sure to press firmly.


And there you have it! You're very own bow! Isn't it cute? And it didn't even take that long to make!


I hope you've enjoyed this tutorial, let me know what you think!

Powered by Blogger.

Connect